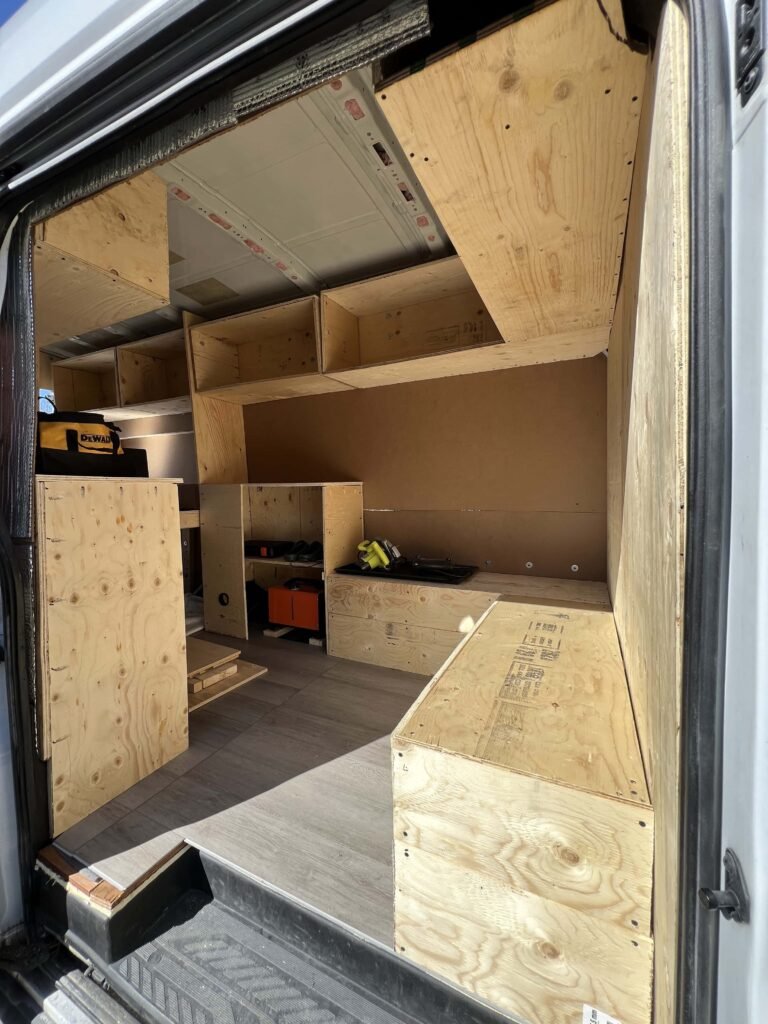
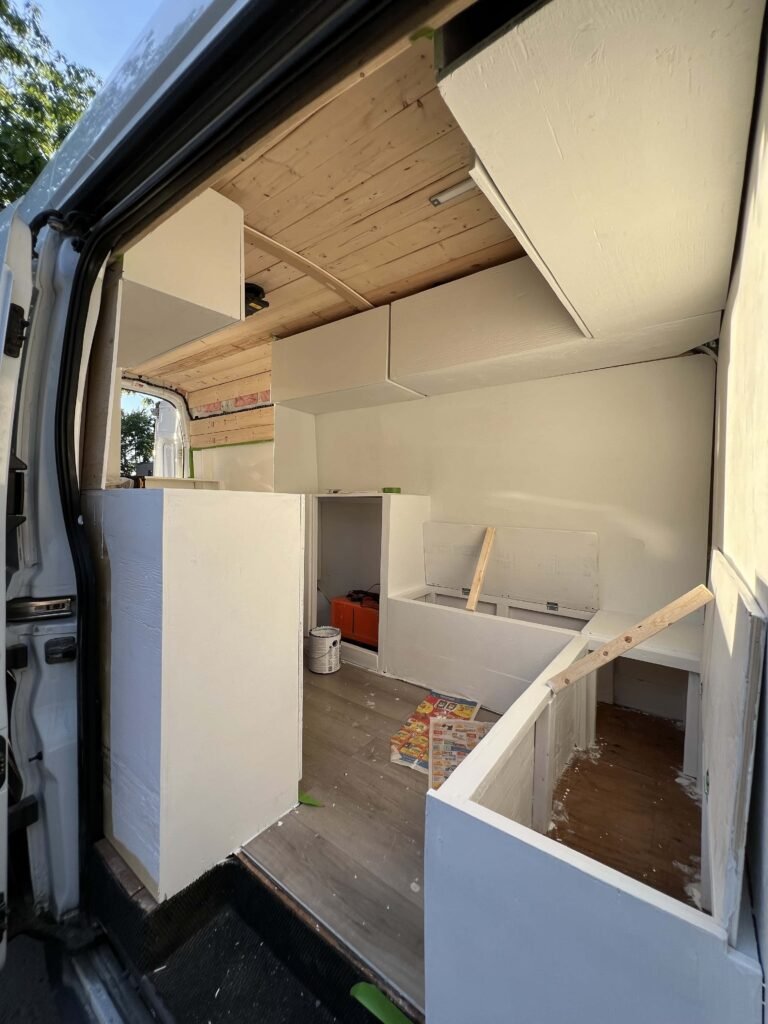
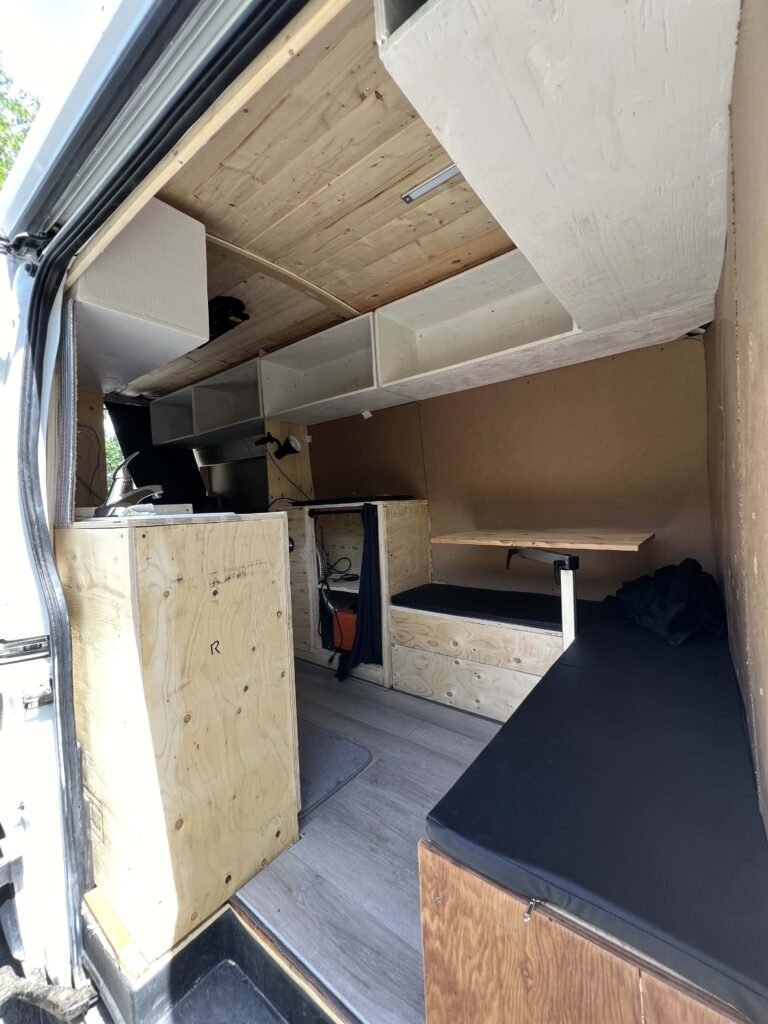
Imagine this: a seamless blend of comfort and practicality. Plush bench seats that morph into hidden storage compartments, swallowing your camping essentials with ease. Sounds too good to be true, right? Wrong.
We’re here to show you how to craft DIY camper van bench seats with hidden storage – the ultimate space-saving hack for your mobile haven. No more gear Tetris, no more claustrophobic chaos. Just pure, unadulterated van living bliss.
This guide cuts through the fluff and delivers a step-by-step approach, packed with clear instructions and budget-friendly tips. Get ready to transform your van from a cluttered catastrophe to a haven of organized adventure.
To build a camper van bench seat, all you need is some 5/8″ plywood and some 2×2 studs to build a solid frame. If you want to add a hidden storage compartment, you’ll also need some hinges. Lastly, you’ll also want to order some custom-sized cushions to fit your custom dimensions (because no van layout is the same). We’ll guide you step-by-step to achieving this in your camper van build, so let’s get to work!
Building the frame for the bench seating
The first step to unlocking hidden storage nirvana is building a sturdy frame. Think of it as the unsung hero, the silent supporter holding your future gear fortress aloft. Here’s where those carpentry skills come into play.
Step 1: Measure Twice, Cut Once
Before diving headfirst into lumber land, grab a tape measure and become one with your van. Measure the designated seating area meticulously. Remember, precision is key here – a wonky frame translates to wonky storage, and nobody wants that. Write down your measurements for both length and width. This will be your blueprint for frame construction.
Step 2: Choosing Your Lumber Warriors
Now, for the muscle of your bench: the studs. We recommend a combination of 2x2s and either 2x3s or 2x4s. The 2x2s will act as the top horizontal frame, providing a solid base for your future seat. For the legs, the 2x3s or 2x4s offer additional sturdiness, crucial for supporting both your weight and your precious cargo.
Step 3: Building the Basics
Here comes the fun part (well, as fun as sawing wood can be)! Using your measurements, cut the 2x2s to the desired length for the top frame. Remember, you’ll need two for the length and two for the width to create a rectangle.
Now, for the legs: grab your chosen stud size (2×3 or 2×4) and cut them to the height you want your bench seat to be. Here’s a pro tip: consider adding an inch or two of extra height to account for the seat cushion and any additional storage compartments you plan to build underneath.
Step 4: Gearing Up for Greatness (Literally)
Alright, with your lumber prepped, it’s time to assemble the frame. We’ll be using bolts to secure the legs to the top frame for maximum stability. You’ll need drill bits that match the diameter of your chosen bolts, as well as wrenches or a drill with a socket attachment to tighten them down. Safety first, so make sure you have proper eye protection when drilling.
Installing the frame in your camper van
We’ve meticulously crafted the frame – the foundation of your hidden storage haven. Now, it’s time to integrate it seamlessly into your van. Here’s where the magic of secure installation takes center stage.
Step 5: Locating Your Anchor Points
Before drilling commences, identify the ideal locations to secure the frame to your van wall. There will likely be pre-existing support beams within the van walls – these are your golden tickets! Utilize a stud finder to pinpoint their exact location and mark them clearly. Ensure even spacing between the anchor points for balanced support.
Step 6: Drilling for Stability
Now, with your trusty drill in hand (and safety glasses firmly secured!), carefully drill pilot holes through the frame’s legs at the marked anchor points. These pilot holes will guide the bolts and prevent the wood from splitting during installation. Remember, a slow and steady drilling technique is your friend here.
Step 7: Bolting Down Your Future
Grab those bolts and corresponding hardware (washers and nuts most likely) – it’s time to create the unbreakable bond between frame and van. Slide the bolts through the drilled holes in the frame legs, ensuring they line up with the marked anchor points on the van wall. Thread on the washers and nuts, tightening them securely with your wrench or socket attachment.
Double-Check for Stability
Give your newly installed frame a good shake test. It should feel sturdy and secure with no wobbling. If you detect any movement, tighten the bolts further or add additional anchor points for ultimate peace of mind.
Safety Note: Be mindful of any electrical wiring or plumbing that might be present behind the van wall. Utilize a wire detector before drilling to avoid any unforeseen complications.

Covering the frame with plywood and installing the hinges
The sturdy frame stands tall, a testament to your carpentry prowess. Now, it’s time to transform it from a skeletal structure into a polished masterpiece. In this stage, we’ll clad the frame with plywood, creating the finished exterior and the comfy seat itself. Here’s where your vision comes to life!
Step 8: Suiting Up Your Frame
Let’s get acquainted with your new best friend – plywood! Measure the exposed sections of your frame, accounting for the overall dimensions you desire for the finished bench. Remember, you’ll need separate pieces for the sides, back (if applicable), and the top seat. Mark these measurements on your plywood and carefully cut them out using a jigsaw or circular saw.
Pro Tip: Double-check your cuts before wielding the saw. A little extra planning can save you from wasted plywood (and a trip to the hardware store).
Step 9: Putting on the Finishing Touches
With your plywood pieces prepped, it’s time to attach them to the frame. Here, you have options! Wood glue and clamps will provide a strong, permanent bond. Alternatively, for easier disassembly in the future, opt for screws and a drill driver. Whichever method you choose, ensure a clean and secure attachment across all the plywood sections.
Step 10: The Gateway to Hidden Wonders – Installing the Hinges
Now for the secret sauce – the hidden storage! To access this treasure trove, we’ll need a hinge system. Here, piano hinges (long, continuous hinges) are your best bet. Measure the length of your desired top seat/storage lid and choose a piano hinge accordingly. Secure one half of the hinge to the underside of the plywood top and the other half to the top of the frame back (or directly to the frame itself, depending on your design).
Choosing the Right Hardware: Select hinge screws that match the thickness of your plywood and frame. Pre-drill pilot holes to prevent the wood from splitting during screw installation.
Step 11: A Sneak Peek at Storage Solutions
With the hinges in place, you can now test the functionality of your hidden storage masterpiece! Open and close the lid to ensure smooth operation and celebrate the ingenious design taking shape.

Finishing the build with sanding, painting and cushions
We’ve reached the home stretch! Your DIY camper van bench with hidden storage is almost complete. Now, it’s time to focus on aesthetics and comfort, transforming this functional marvel into a stylish and inviting part of your van.
Step 12: Sanding for a Flawless Finish
Before applying any paint, grab some sandpaper and give your plywood masterpiece a good sanding. This will remove any rough spots or imperfections, creating a smooth surface for a flawless finish. Start with a coarser grit sandpaper (around 80-grit) for initial smoothing, then progress to a finer grit (around 120-grit) for a polished look.
Pro Tip: Don’t underestimate the power of dust masks! Sanding creates a lot of dust, so protect your lungs while you work.
Step 13: Painting Your Vision
With a smooth canvas at your disposal, unleash your inner artist! Choose a paint color that complements your van’s overall aesthetic. Here are some resources to help you find the perfect paint for your project [link to resources on painting plywood for furniture].
Painting Tips:
- Apply a coat of primer for better paint adhesion and a more even finish.
- Opt for light-colored paints to create a sense of spaciousness in your van.
- Use painter’s tape to mask off any areas you don’t want painted.
- Apply multiple thin coats of paint for a smooth, professional finish. Allow each coat to dry completely before applying the next.
Step 14: The Comfort Factor – Installing Custom Cushions
Now for the cherry on top – the comfy seat! Here’s where those custom cushions come in. We won’t delve into the specifics of crafting cushions here, but the linked resources will provide valuable guidance [link to resources on sewing cushions for benches].
Consider these options:
- Removable Cushions: Opt for cushions with zippers or velcro closures for easy cleaning and access to hidden storage.
- Folding Cushions: For added functionality, consider a split-cushion design that folds up to reveal the storage compartments.

Summary
There you have it! From a basic frame to a polished masterpiece, we’ve guided you through the process of building your very own DIY camper van bench seat with hidden storage. This ingenious creation not only adds comfort and style to your van but also solves that age-old storage dilemma.
Feeling inspired? Don’t stop here!
- Next week (Week 9): We’ll be tackling another essential van build element – cabinets! Join us as we delve into clever storage solutions and functional cabinet designs to maximize your van’s organization potential.
- Missed last week’s post (Week 7)? We explored the art of crafting a partition wall, a brilliant way to create separate living spaces within your van.
Want to be part of a supportive DIY camper builder community? Share your projects, ask questions, and get inspired by fellow vanlifers! [JOIN NOW]
Now, grab your tools, unleash your creativity, and get ready to transform your van into the ultimate mobile adventure haven!


